How to Create and Run a Workflow
In this example, we are going to build a Workflow from scratch that detects dogs, classifies their breeds, and visualizes the results.
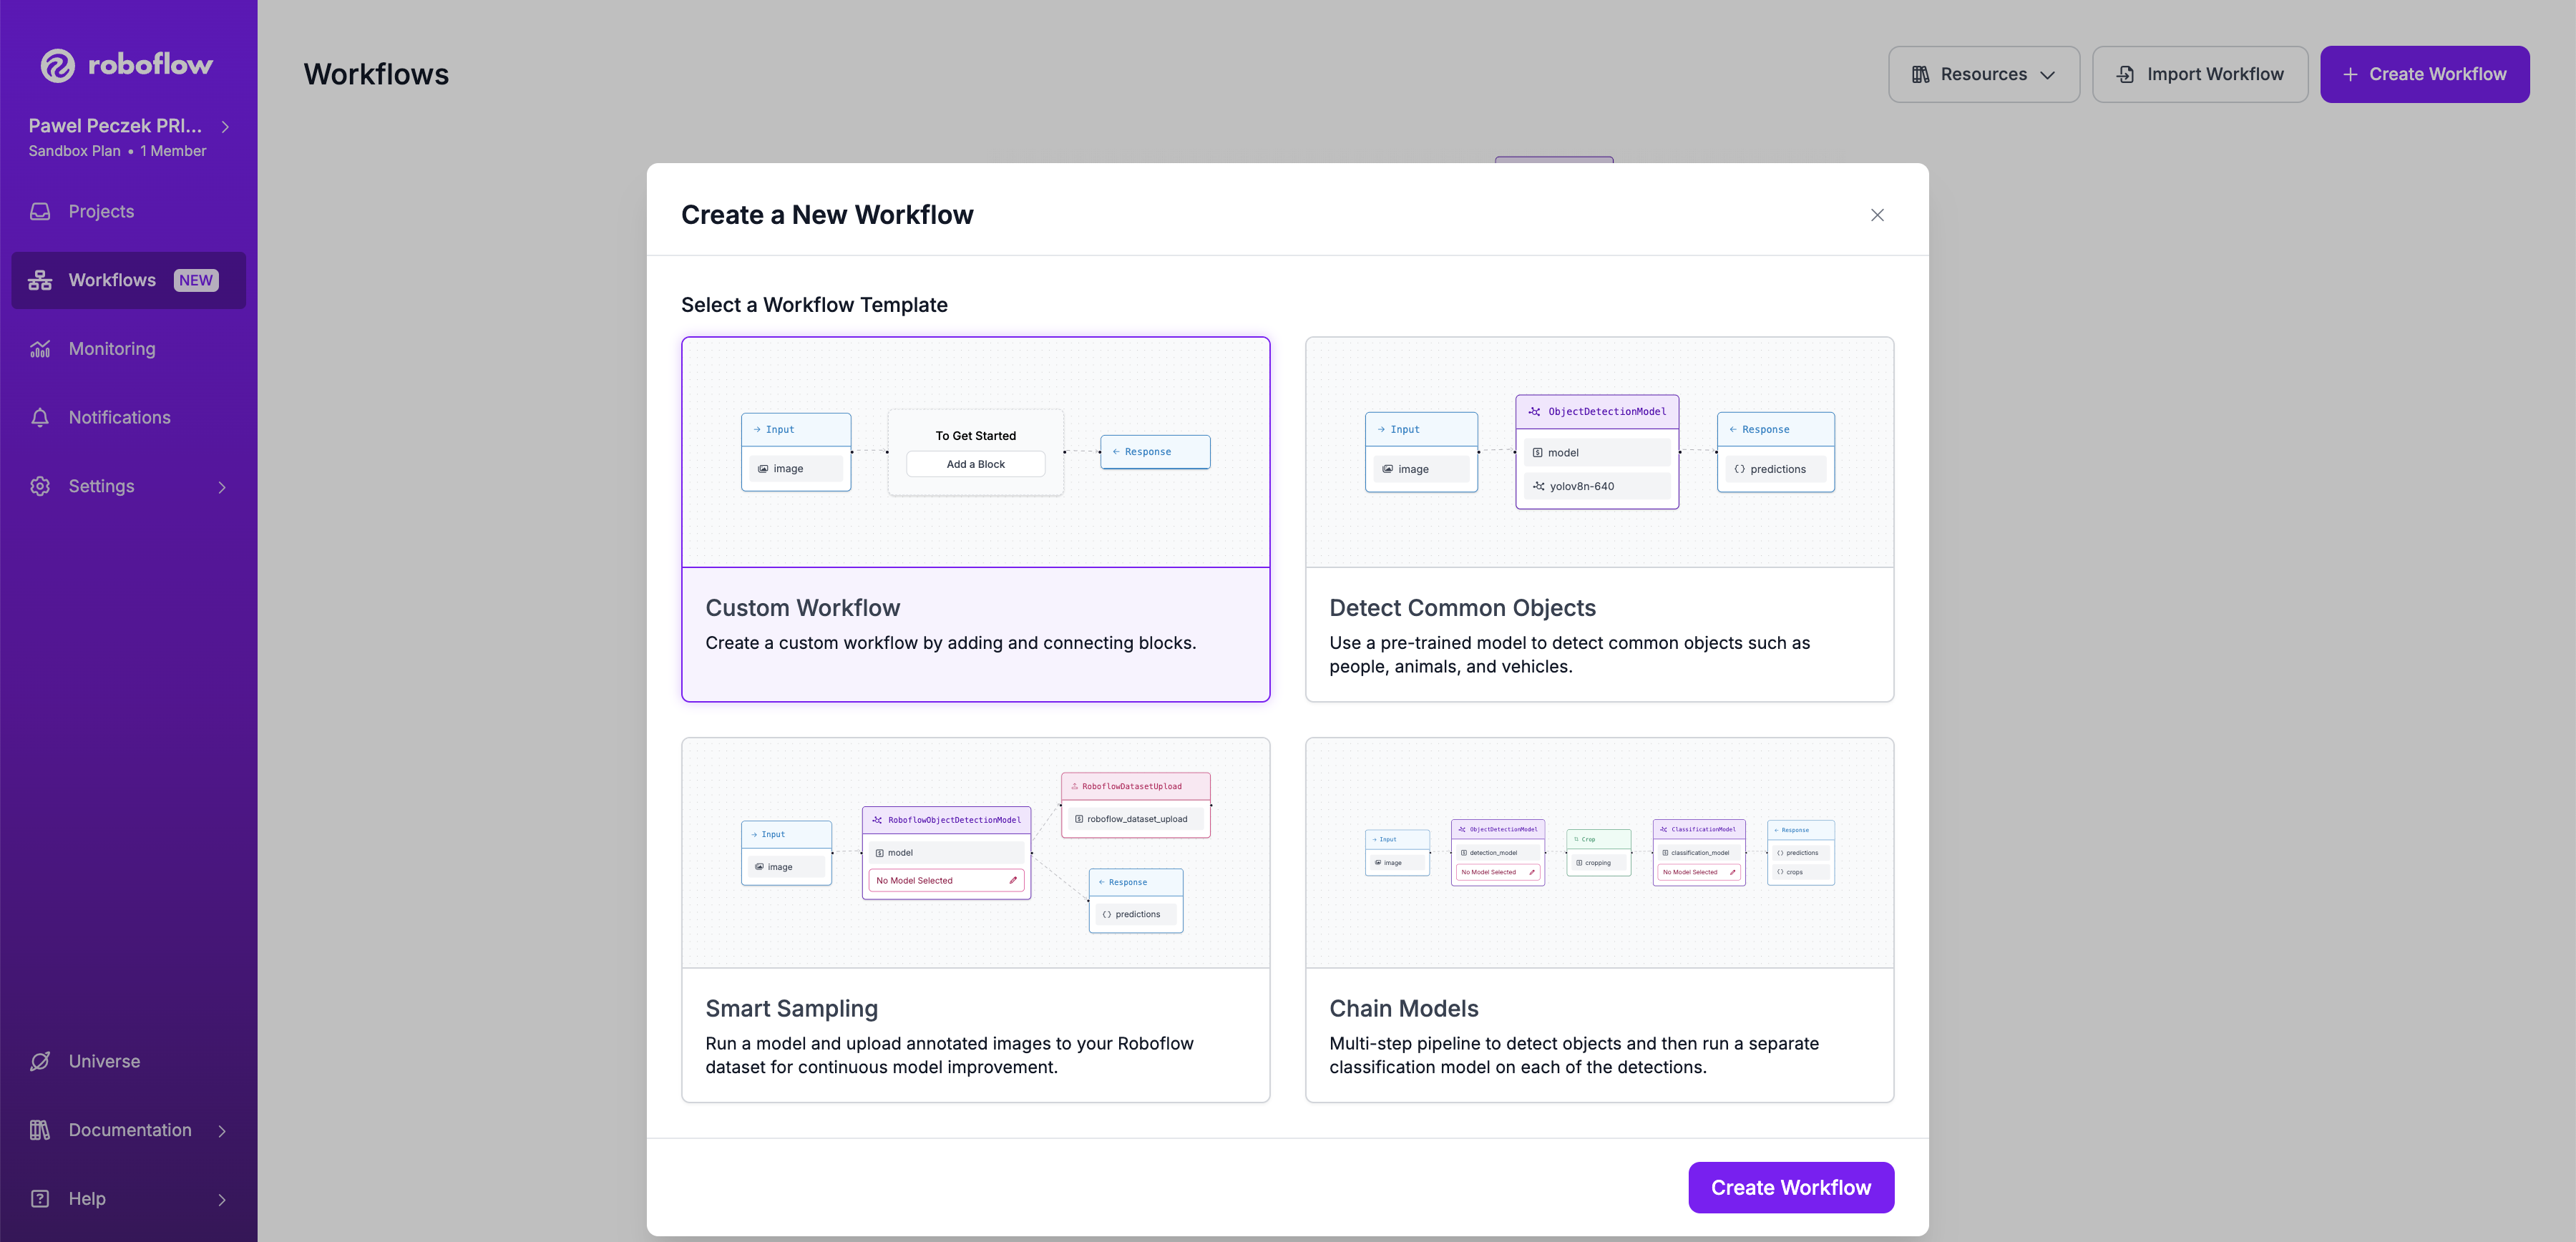
Step 1: Create a Workflow
Open https://app.roboflow.com/ in your browser and navigate to the Workflows tab, then click the Create Workflow button. Select Custom Workflow to start the creation process.
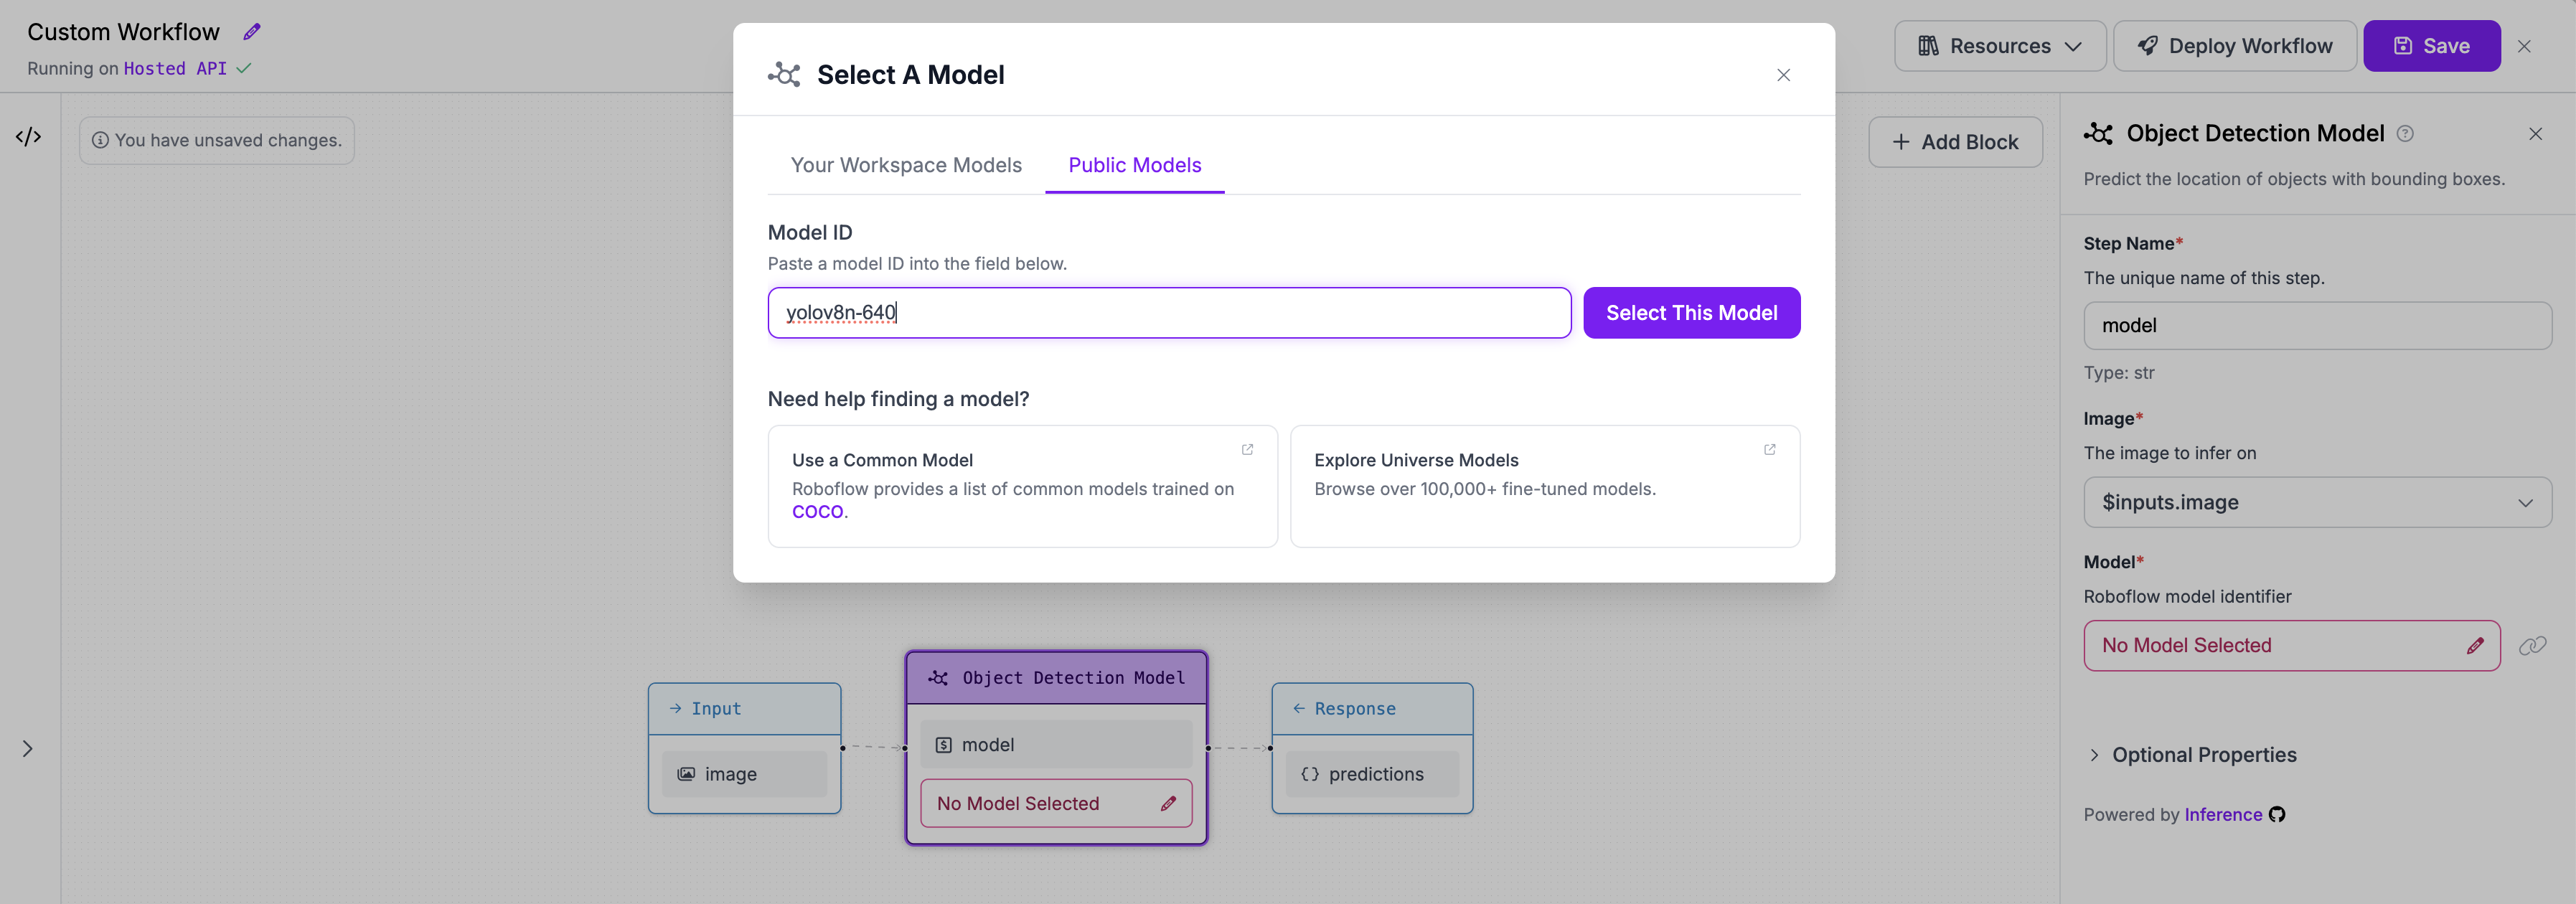
Step 2: Add an object detection model
We need to add a block with an object detection model to the existing workflow. We will use the rfdetr-small model.
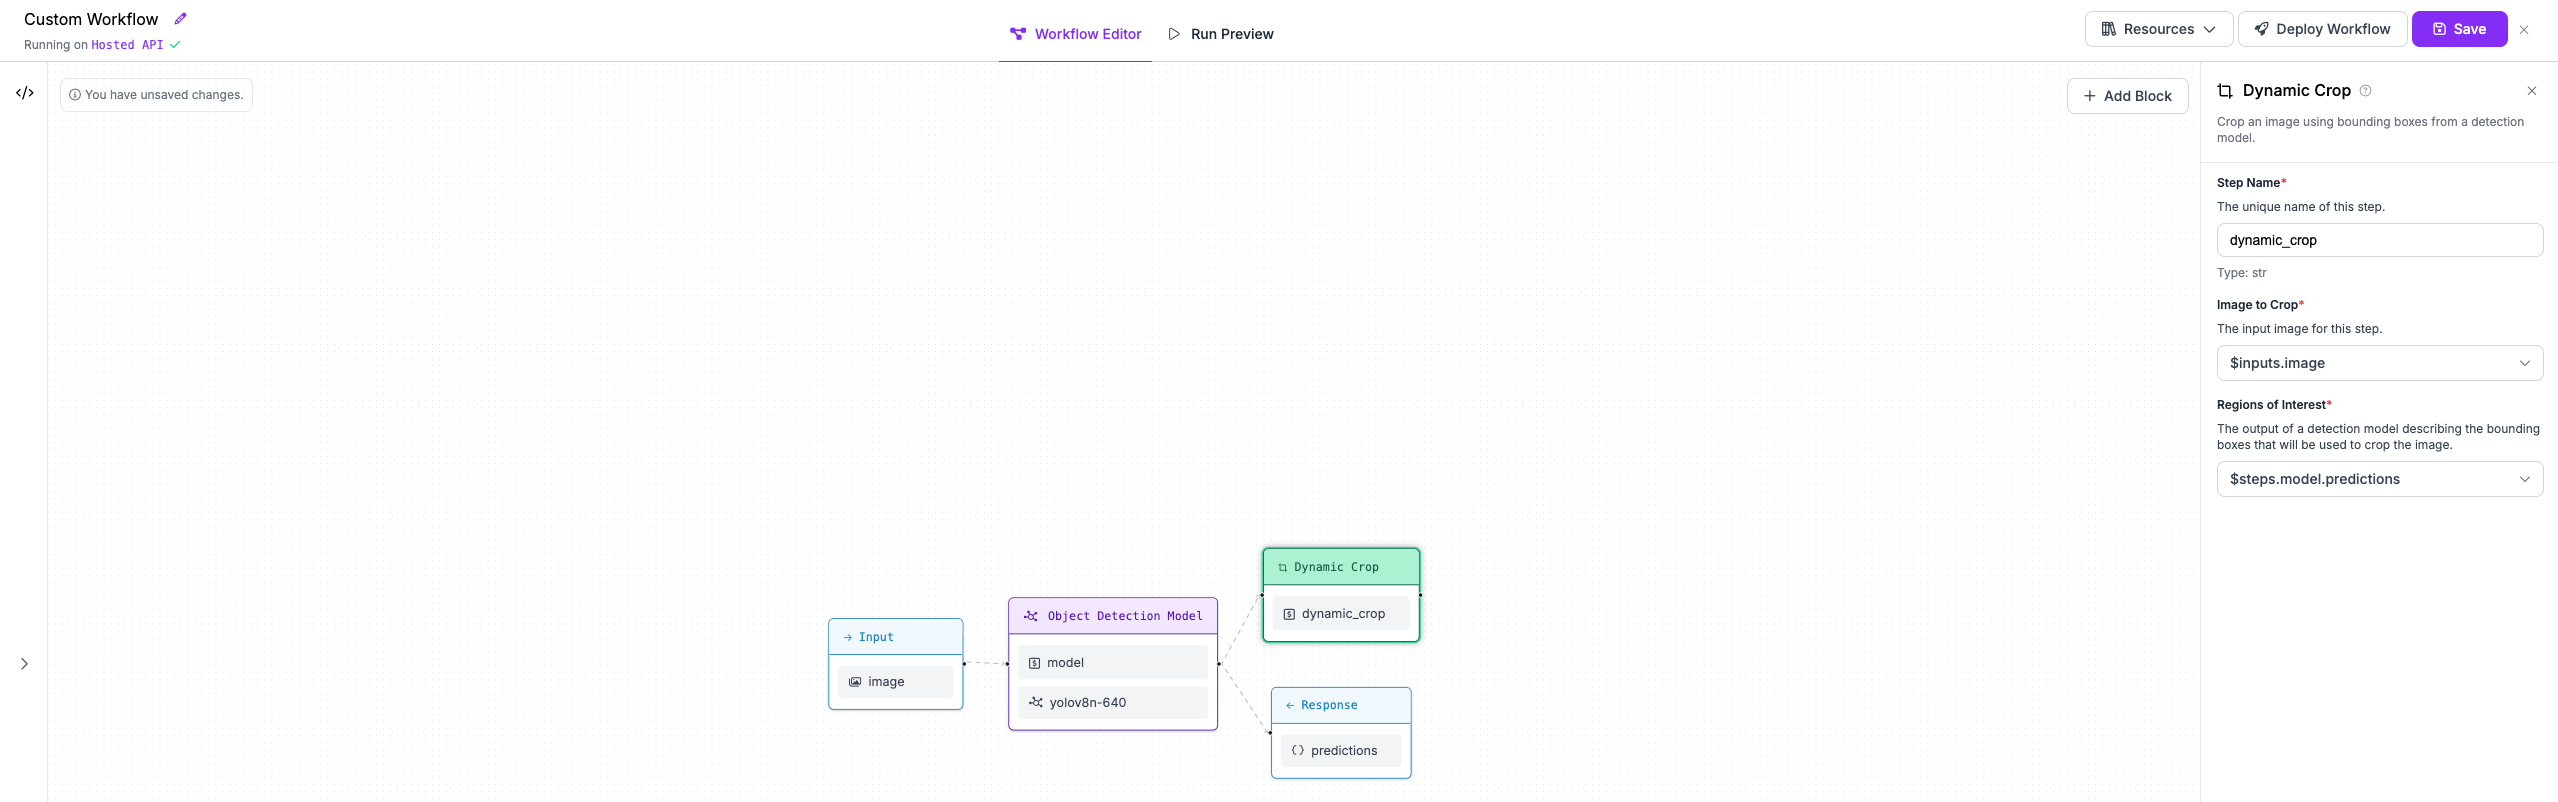
Step 3: Crop each detected object to run breed classification
Next, we'll add a block to our Workflow that crops the objects detected by our first model.
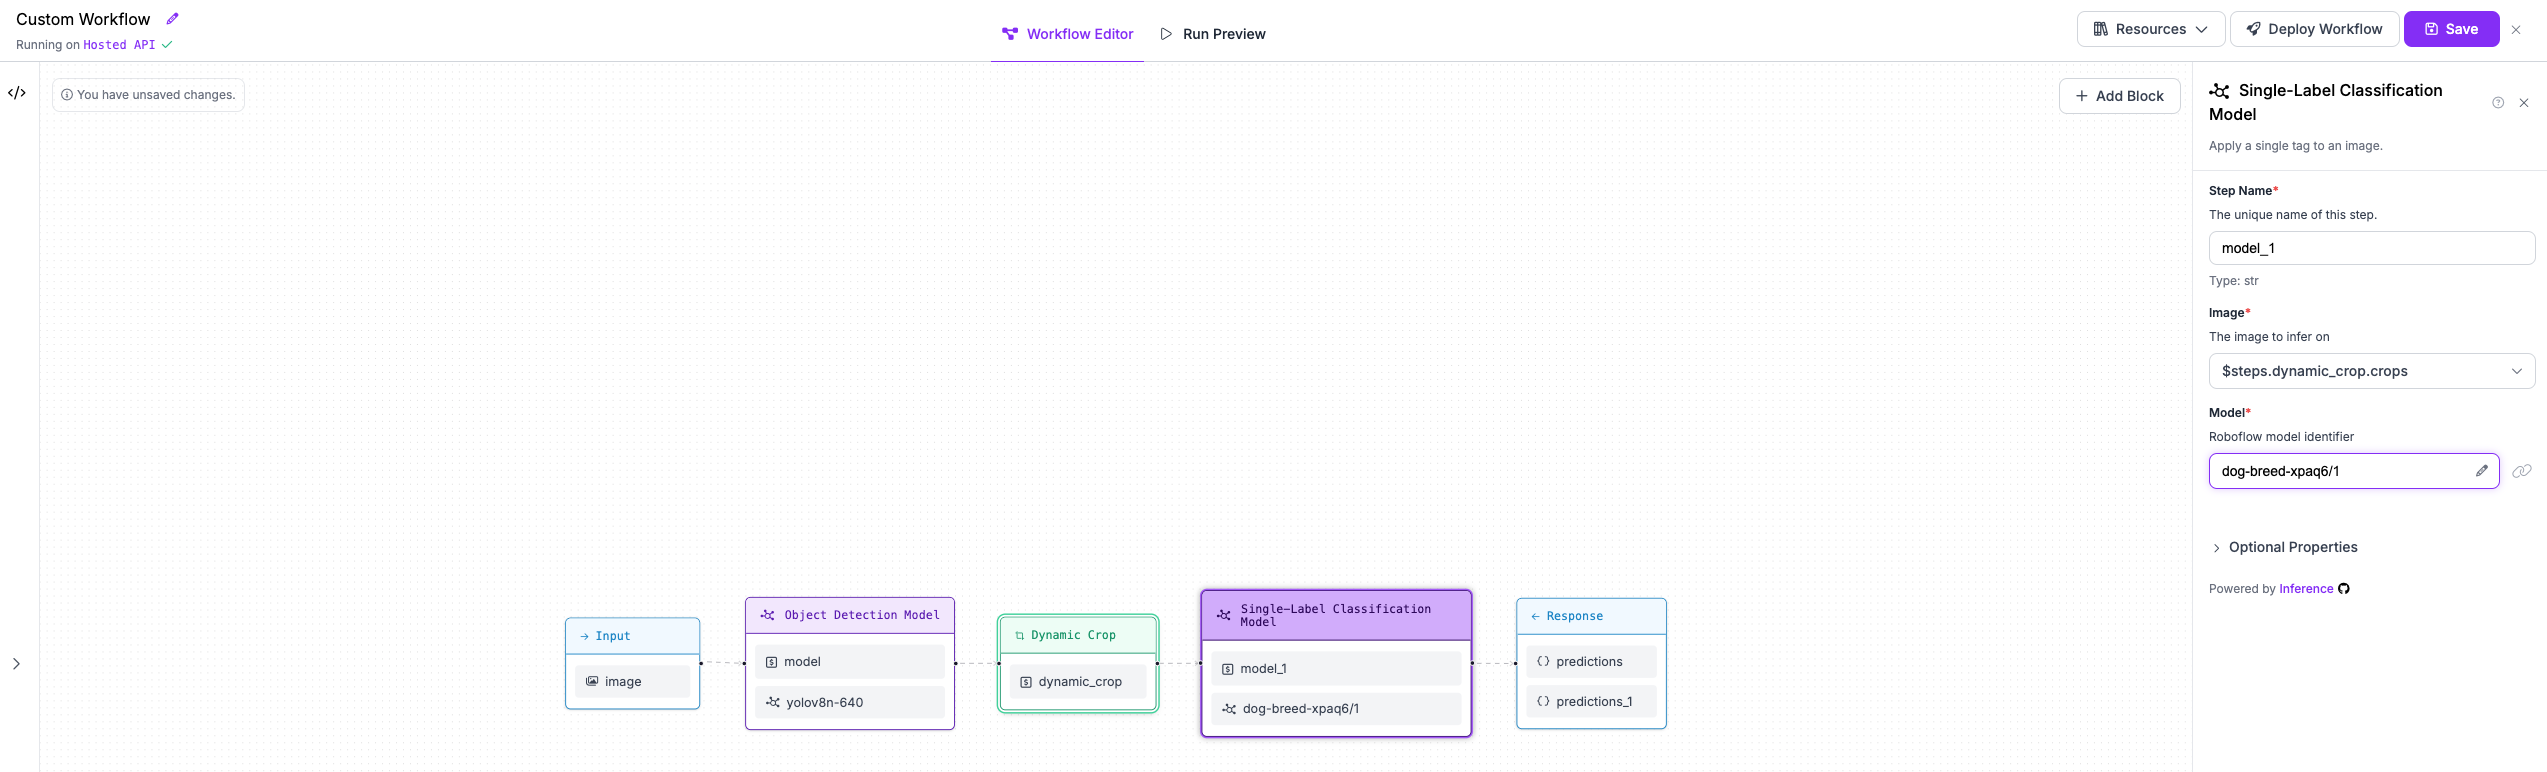
Step 4: Classify dog breeds with second stage model
We will then add a classification model that runs on each crop to classify its content. We will use
the Roboflow Universe model dog-breed-xpaq6/1. Ensure that in the block configuration the Image property
points to the crops output of the Dynamic Crop block.
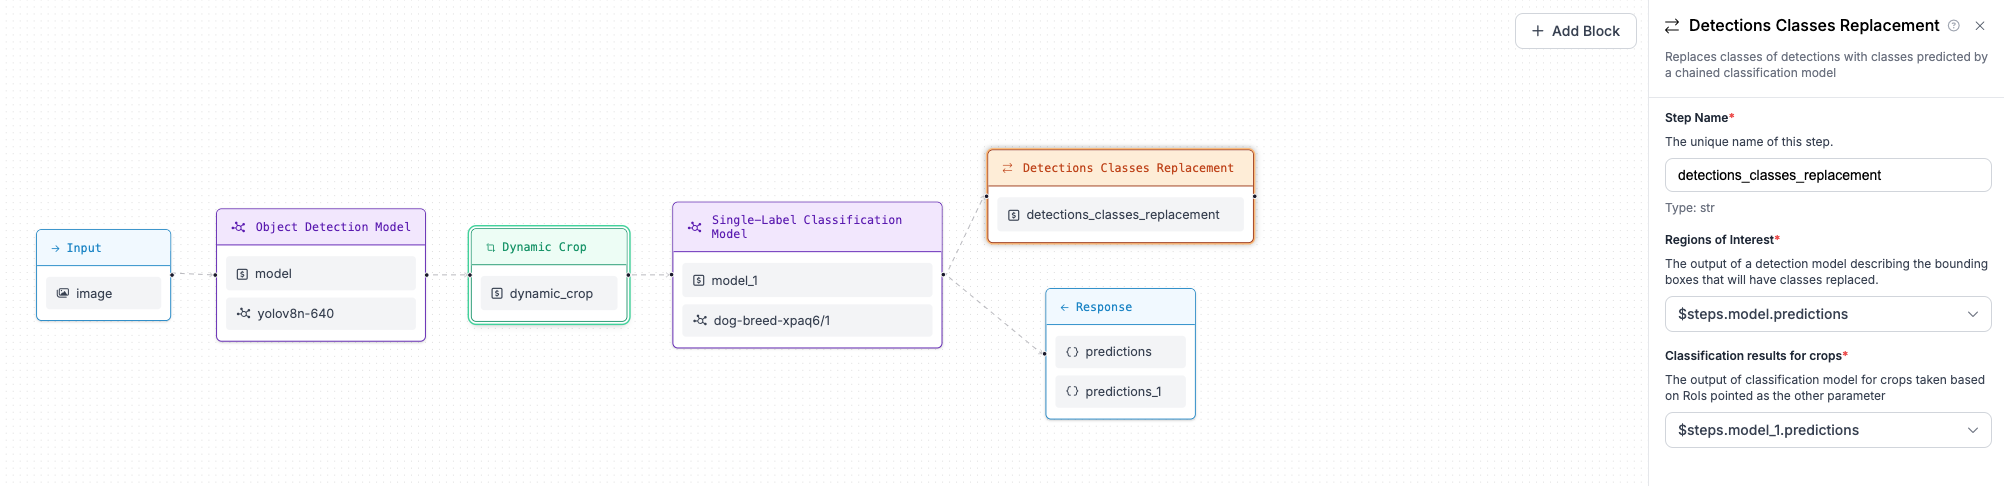
Step 5: Replace Bounding Box classes with classification model predictions
When each crop is classified, we want to assign the predicted class (dog breed) to the bounding boxes from the object detection model. To do this, we use the Detections Classes Replacement block, which accepts a reference to the object detection model predictions as well as a reference to the classification results on the crops.
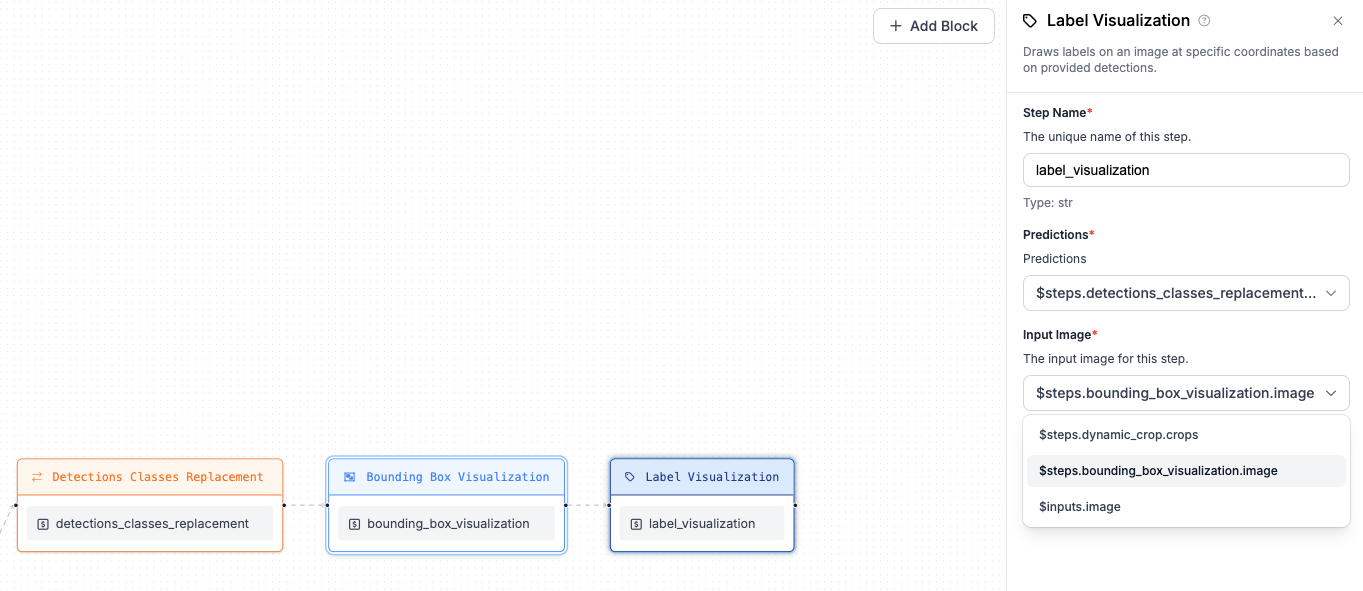
Step 6: Visualise predictions
As a final step of the workflow, we want to visualize our predictions. We'll use two
visualization blocks: Bounding Box Visualization and Label Visualization chained together.
First, add Bounding Box Visualization and refer to $inputs.image for the Image property (that's the
image sent as input to the workflow). The second step (Label Visualization) should point to
the output of the Bounding Box Visualization step. Both visualization steps should refer to predictions
from the Detections Classes Replacement step.
Step 7: Construct output
You now have everything ready to construct your workflow output. You can use any intermediate step output that you need, but in this example we will only select bounding boxes with replaced classes (output from the Detections Classes Replacement step) and visualization (output from the Label Visualization step).
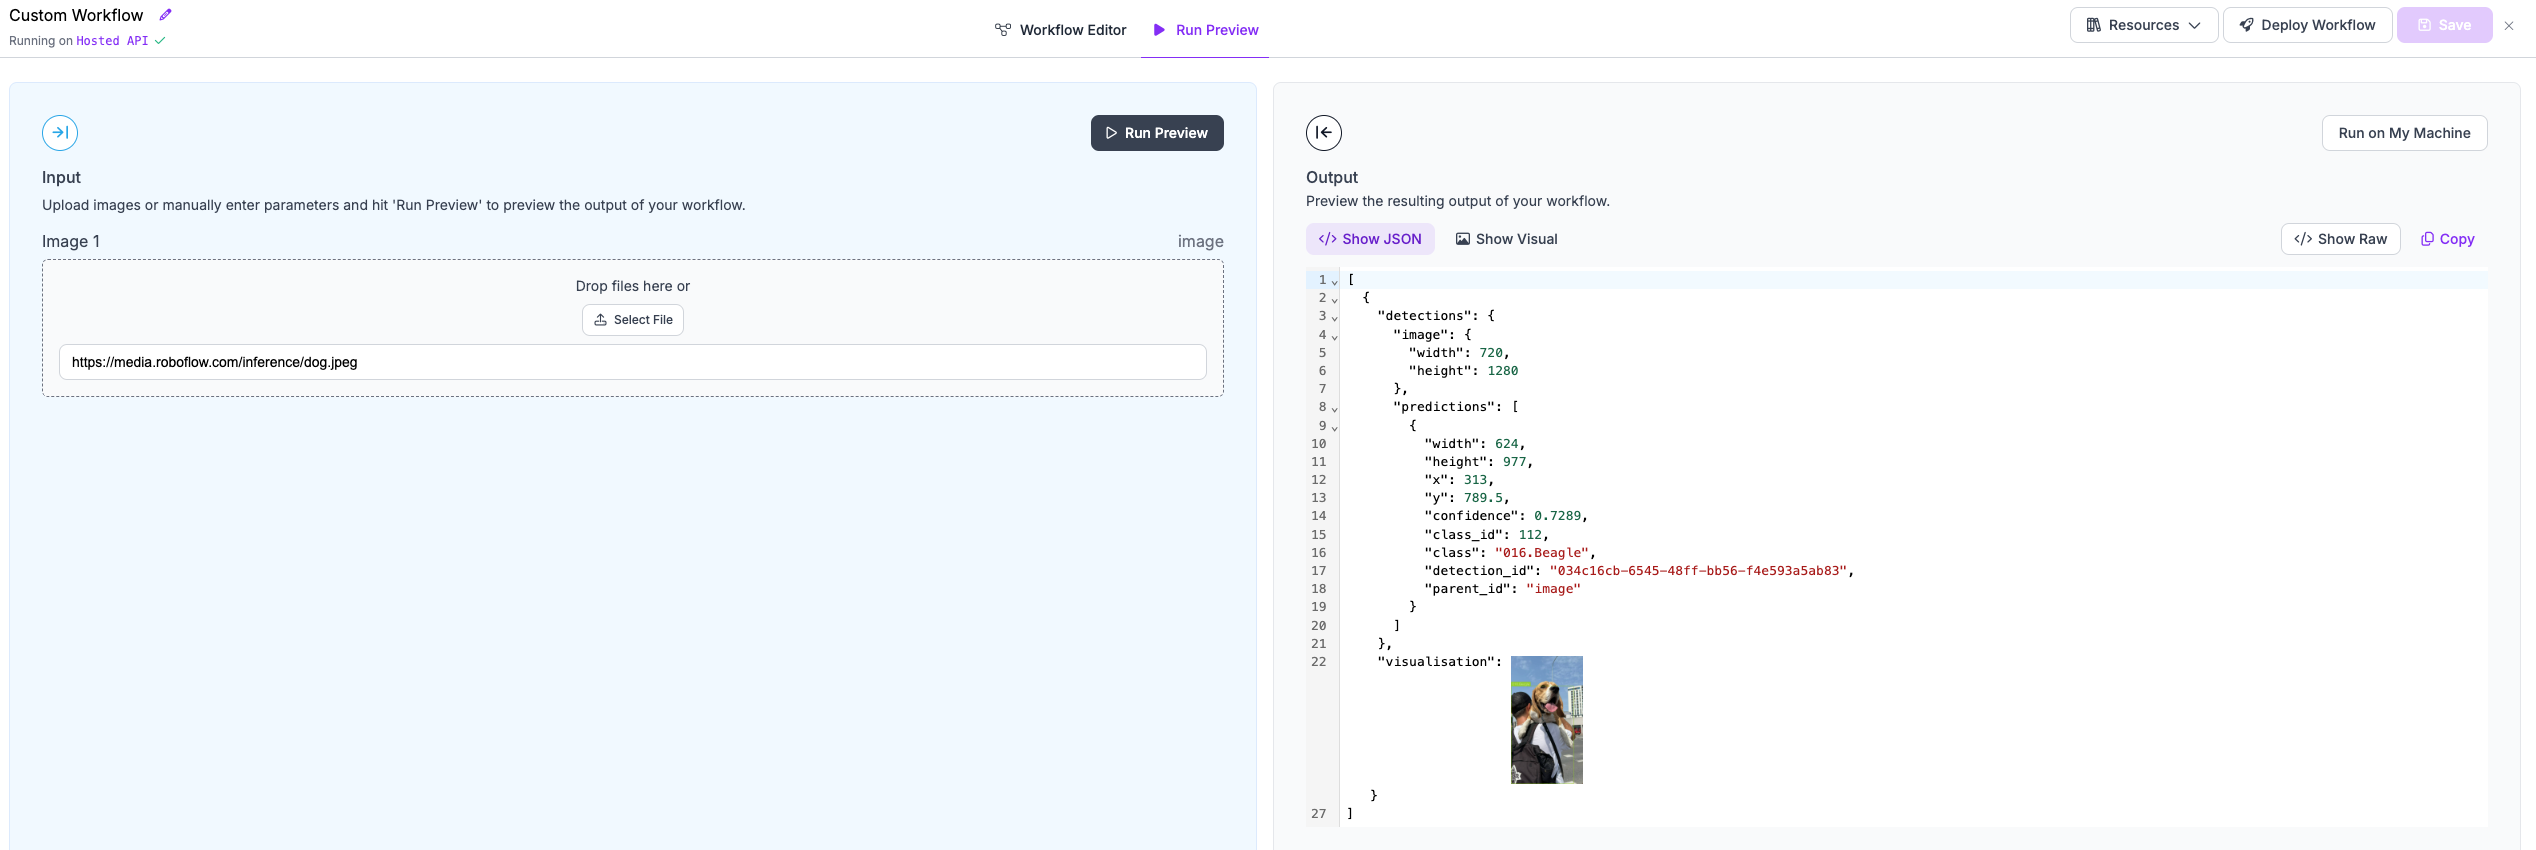
Step 8: Running the workflow
Now your workflow is ready. You can click the Save button and move to the Run Preview panel.
We will run our workflow against the following example image: https://media.roboflow.com/inference/dog.jpeg.
Here are the results:
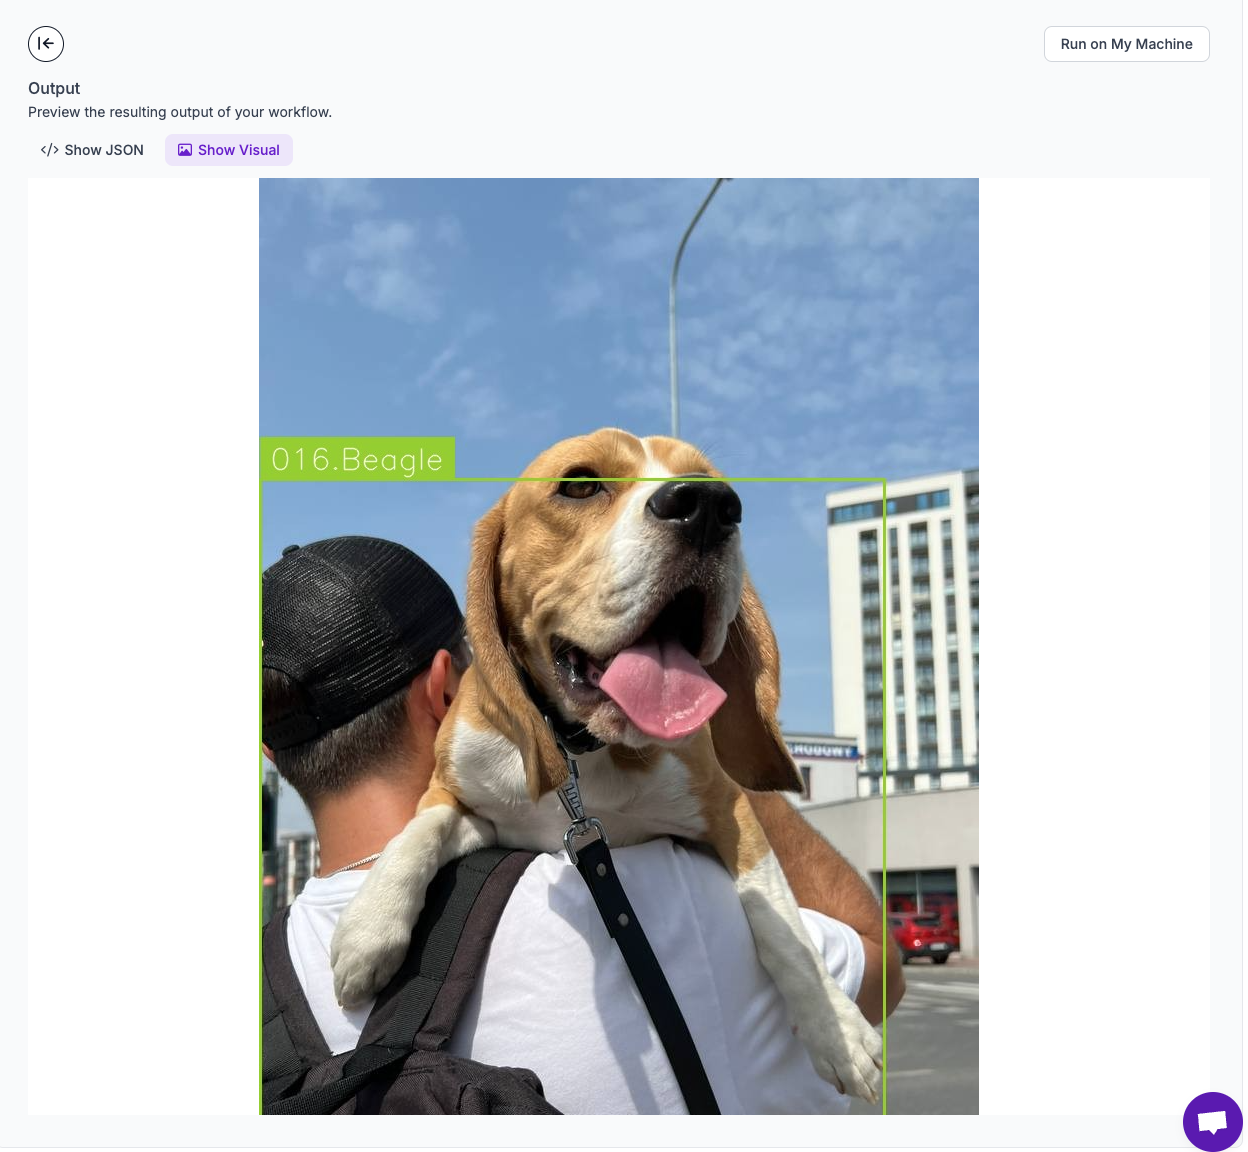
Click the Show Visual button to see the results of our visualization efforts.
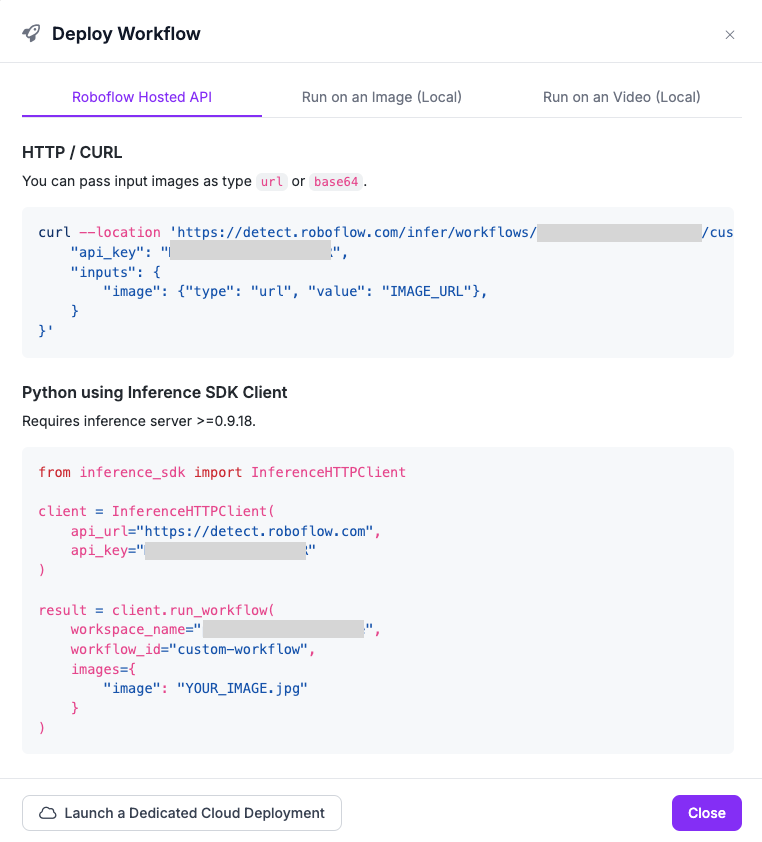
Different ways of running your workflow
Your workflow is now saved on the Roboflow platform. This means you can run it in several ways, including:
-
HTTP request to Roboflow Hosted API
-
an HTTP request to your local instance of the
inferenceserver -
on video
To see code snippets, click the Deploy Workflow button:
Workflow definition for quick reproduction
To make it easier to reproduce the workflow, below you can find a workflow definition you can copy-paste to UI editor.
Workflow definition
{
  "version": "1.0",
  "inputs": [
    {
      "type": "InferenceImage",
      "name": "image"
    }
  ],
  "steps": [
    {
      "type": "roboflow_core/roboflow_object_detection_model@v1",
      "name": "model",
      "images": "$inputs.image",
      "model_id": "rfdetr-small"
    },
    {
      "type": "roboflow_core/dynamic_crop@v1",
      "name": "dynamic_crop",
      "images": "$inputs.image",
      "predictions": "$steps.model.predictions"
    },
    {
      "type": "roboflow_core/roboflow_classification_model@v1",
      "name": "model_1",
      "images": "$steps.dynamic_crop.crops",
      "model_id": "dog-breed-xpaq6/1"
    },
    {
      "type": "roboflow_core/detections_classes_replacement@v1",
      "name": "detections_classes_replacement",
      "object_detection_predictions": "$steps.model.predictions",
      "classification_predictions": "$steps.model_1.predictions"
    },
    {
      "type": "roboflow_core/bounding_box_visualization@v1",
      "name": "bounding_box_visualization",
      "predictions": "$steps.detections_classes_replacement.predictions",
      "image": "$inputs.image"
    },
    {
      "type": "roboflow_core/label_visualization@v1",
      "name": "label_visualization",
      "predictions": "$steps.detections_classes_replacement.predictions",
      "image": "$steps.bounding_box_visualization.image"
    }
  ],
  "outputs": [
    {
      "type": "JsonField",
      "name": "detections",
      "coordinates_system": "own",
      "selector": "$steps.detections_classes_replacement.predictions"
    },
    {
      "type": "JsonField",
      "name": "visualisation",
      "coordinates_system": "own",
      "selector": "$steps.label_visualization.image"
    }
  ]
}
Next Steps
Now that you have created and run your first workflow, you can explore our other supported blocks and create a more complex workflow.
Refer to our Supported Blocks documentation to learn more about what blocks are supported. We also recommend reading the Understanding workflows page.